Table of Contents
Brother HL-2135W
The Brother HL-2135W is a mono laser printer with the ability of a wireless connectivity.
This guide describes how to install it in order to use it in Wi-Fi mode.
Printer's configuring procedures
The following procedures are necessary to (re)configuring the printer or to know its set up. They have to keep in mind because they will be recalled several times in this guide.
Reset network settings
This method resets password and IP for the print server.
- Turn off the printer.
- Hold the Go button down while the printer is being turned on and keep it down until all LEDs light up and the Ready LED turns off.
- Release Go and make sure that all LEDs turn off.
- Press Go six times. The printer will restart.
Print printer and network settings
This method allows to print the printer and network settings (2 sheets). If the wireless is disabled (the relative green LED, on the back panel, is turned off) it will be print only the printer settings (1 sheet).
- Turn on the printer.
- Press the Go button three times within 2 seconds.
Tip: if the IP Address is 0.0.0.0, wait for one minute and try again. Normally it happens after a network settings reset.
Enable/Disable wireless network
This method allows to enable the wireless network (the relative green LED, on the back panel, turns on) or to disable it and to print the network settings (1 sheet).
- Hold the Go button down for 10 seconds till it starts to print.
If the wireless is enabled, on the network configuration page will be print:
<Interface> WirelessLAN on
Download and Install the printer drivers
The following steps are necessary in order to install the printer drivers.
- From Synaptic, install the packages:
apparmor-utilscups
- Run the command:
sudo aa-complain cupsd - Install
LPRandcupswrapperdrivers following the below steps:- turn on the printer and connect it to the PC with USB cable;
- open a terminal in the folder in which the drivers were downloaded and install them with the commands:
sudo dpkg -i --force-all <LPR>.deb
sudo dpkg -i --force-all <cupswrapper>.deb
Info: on Fedora, it's required the Perl environment, which can be installed with:
sudo dnf install perl-core
- check if the installation turn out well with:
dpkg -l | grep Brother
Interface the printer with the network access point/router
The following steps associate an IP address to the printer; once done the printer can be installed on multiple computers.
This means that, even after a new installation of the OS on all the computers, the printer can be reinstalled with the same IP address that was used until then and which can be obtained from its network settings.
Only if the network configurations are changed, it's necessary to repeat the following procedure.
- Connect the printer to the PC with the USB cable.
- Go to
Create New Wi-Fi Networkand create a new hotspot with: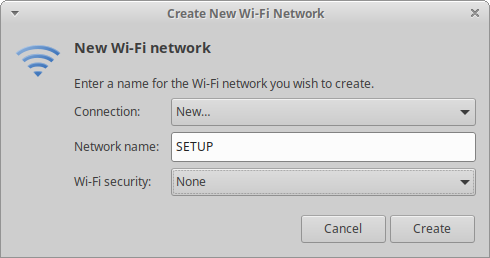
Figure 1: Creation of the hotspot SETUP.once connected to it, go to
Edit Connectionsand edit it as follows: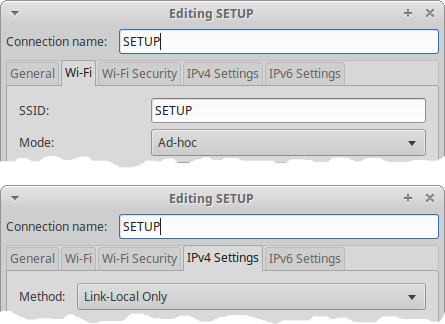
Figure 2: Editing the hotspot SETUP. - Reset the printer's network parameters.
- Enable the wi-fi on the printer.
- Print the new printer's network configuration which should be of the form
IP Address 10.42.*.* (via DHCP)
or:
IP Address 169.254.*.* (via APIPA)
- Open a browser and type the printer's IP address.
- Enter in
Network Configurationwith user admin and password access.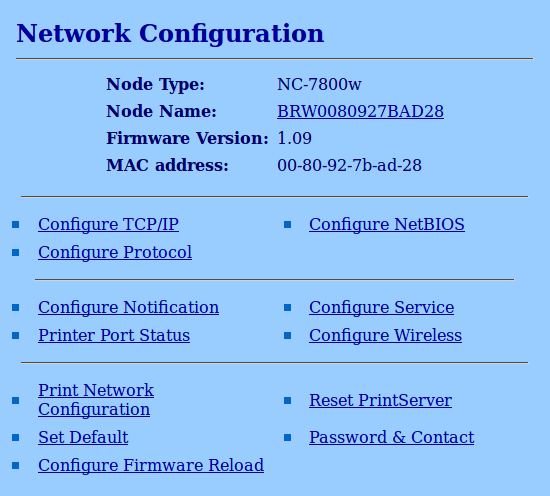
Figure 3: Network configuration area. Here is also reported the printer's MAC address. - Go to
Configure Wirelessand set the parameters as follows: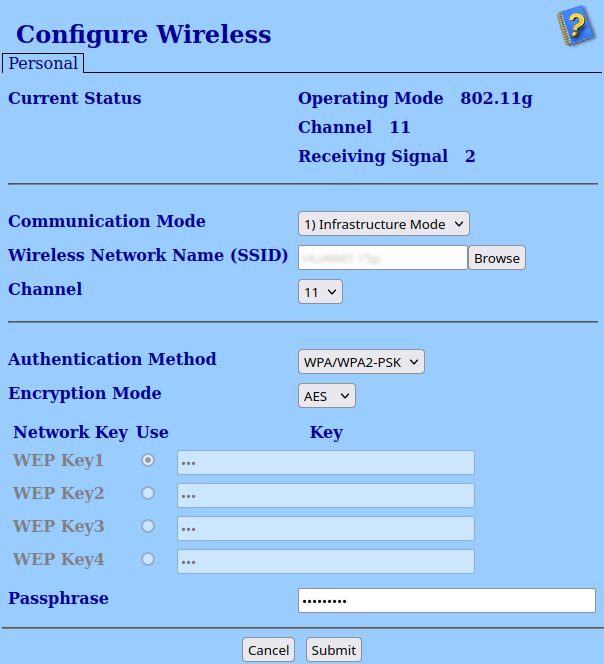
Figure 4: Association of the one's wireless network to the printer. Set the parameters according to the access point/router's settings. - Remove the USB cable and switch hotspot from
SETUPto the one's Wi-Fi network. - Print the new printer's network configuration and take note of the new IP address which should be of the form
IP Address 192.168.*.* (via DHCP)
- Open a browser and type the printer's IP address.
- Enter in
Network Configurationwith user admin and password access. - Go to
Configure TC/IPand set a static IP address andDHCPas boot method: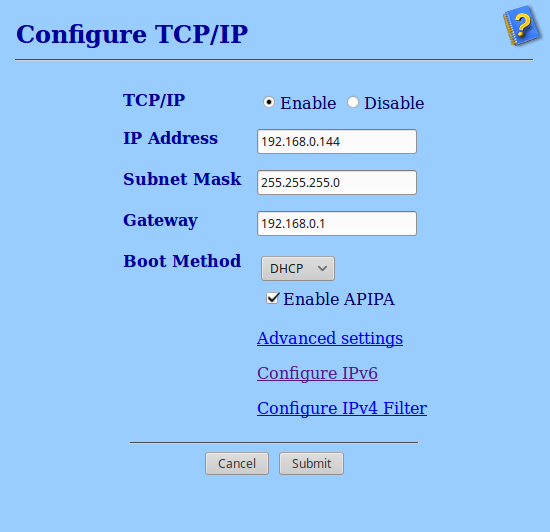
Figure 5: Registration of a static IP address and selection of DHCPas boot method.
Install the printer
Important: Be sure to have the package system-config-printer.
If not already done, disconnect the USB cable from the printer.
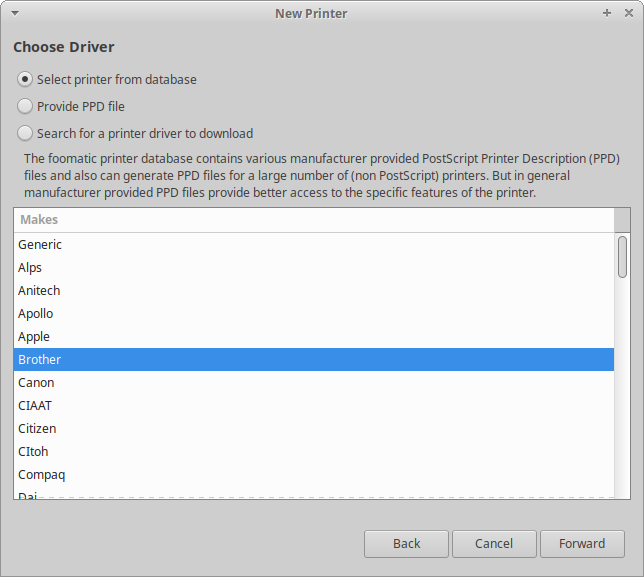
Go to Settings > Printers and add the new printer using its URI as follows:
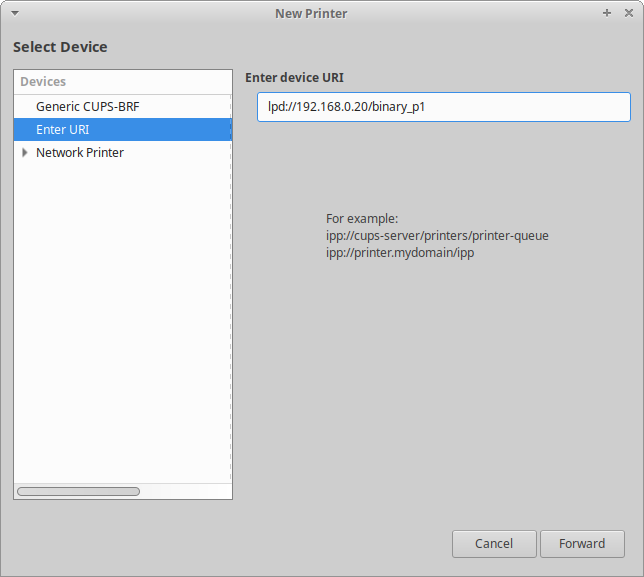
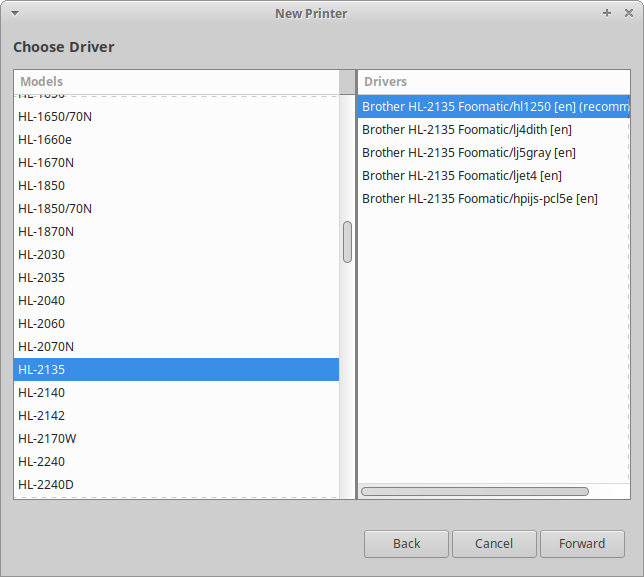
Choose the printer's driver from the database and select the accompanied versions: